Building a minecraft server on a single board computer
An excuse
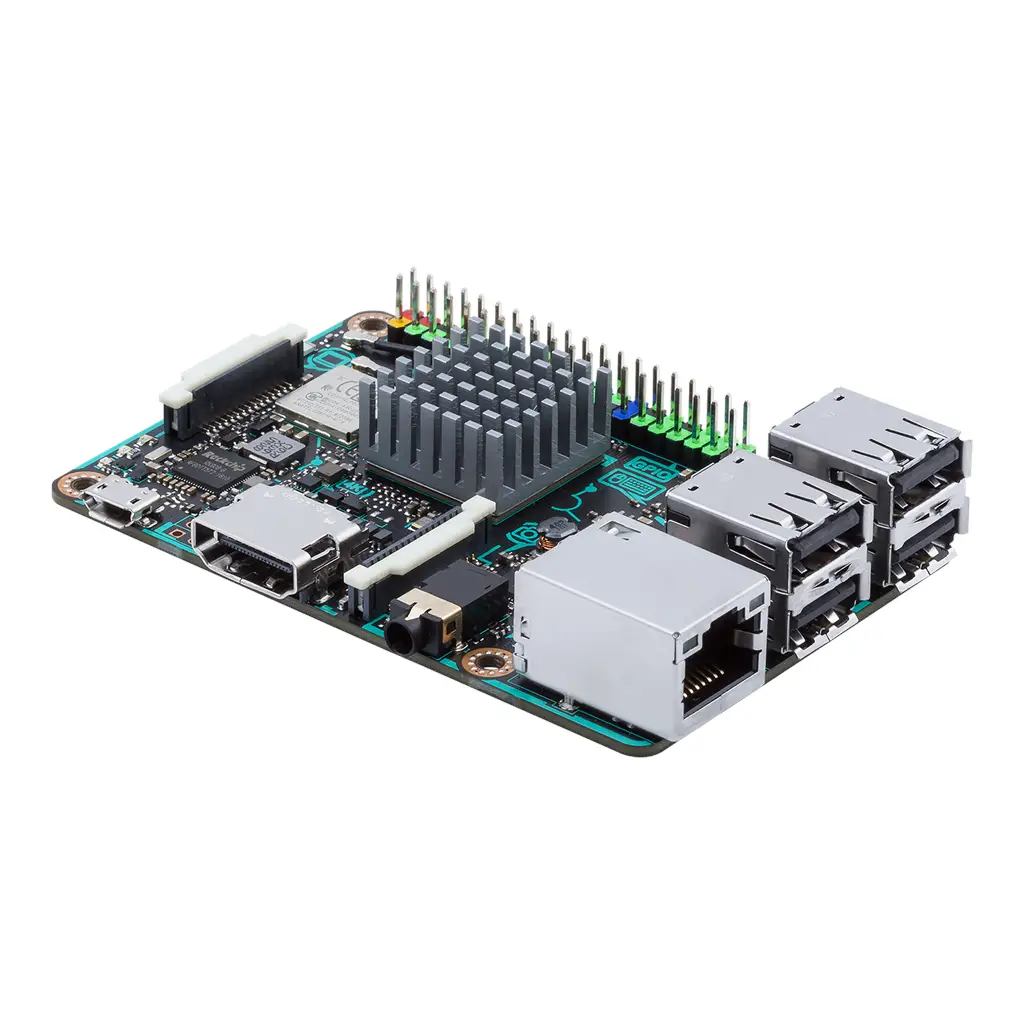
I have this single board computer at home, the Asus Tinkerboard. It's a small and quite powerful machine, not unlike the Raspberry Pis that kickstarted the SBC revolution. this has a bit of a solution looking for a problem effect on me: when I remember it exists, I desperately try to find a reason for its existance, be it an ad-blocking dns server with Pi-hole, or a NAS with OpenMediaVault (which by the way I've never been able to get working).
Time and time again, the perfect excuse to keep it plugged to my router has been to use it as a minecraft server. This article is a brief summary of all I've learned in the (now plentiful) times I've attempted the process.
Enter the beast
The Asus Tinkerboard (original, not S, not 2) has a quad core 32 bit ARM SOC from Rockchip, 2GB of LPDDR3 RAM, and a pretty standard IO.
It is the best kind of powerful: just powerful enough. This forces you to get creative in finding solutions and ways to optimize for your use case, which for my taste is the entire fun of the process
Choosing an OS
Now, for SBC like these there are mainly two options when dealing with operating systems: using the manifacture-provided one or using Armbian. The first choice in this case is called Tinker OS: a Debian-based os that should offer best-case-scenario in performance and hardware access. So why did I choose Armbian instead?
Armbian is a multi-system operating system based on Debian available for a variety of single board computers. As far as I know it does not offer any measurable improvement over Tinker OS, but what it does offer is that it worked that one time that the Asus-provided OS didn't. So I guess the answer to the question is consistency?
Coffee beans
The next step is a bit more difficult. That is, minecraft needs Java. The first time I attempted this task, I barely knew how Java worked and tried searching for an answer on how to install it on google. This sent me spiraling in a maze of non working answers and dead-end paths.
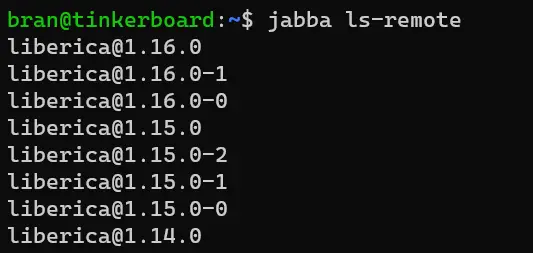
Until one day, I found Jabba. Shout out to my OOP course in university for suggesting it as a way to install java! It's a quite powerful tool, automatically listing the available jdk distributions for your platform and os, and letting you install and switch between them with ease. This served me well for a long time, until recently when minecraft 1.18 came out, and I was faced with the task of upgrading to Java 17.
The Javaest of them all
So, the situation was this: Jabba relies on a .json index file to list the available java versions. This .json, located in the root folder of the repository, is updated once in a while by the jabba mantainers, and serves as the default way you fint and install java using jabba. The problem was that for some reason the index had not been updated to feature a 32 bit arm version of the Java 17 JDK, not even one.
At first I was afraid this was the end. It had finally come the time when nobody cared about my architecture anymore, and surely everyone had stopped building the new java for it.
But I didn't despair, and started looking for solutions. It turns out that somone was -in fact- building for arm32: Bellsoft, in the form of Liberica, among others. Still, I wanted to keep using jabba as it was a good way to upgrade java in the future, and it would take care of setting all the environment variables for me.
Fortunately the jabba developers thought of this use case, and there is a built in way to install a java distribution through a download link.

Note: now that I check, there actually is an apt package for every lts version of Java. It either wasn't available the first time I tried, I simply didn't find it, or I just wanted to use a non-lts version. I don't remember 🤷. The fastest way to get Java 17 looks like to just be apt install openjdk-17-jdk
So here we are, with a fresh copy of Java 17 on our snappy new Armbian installation. How about actually getting the game on there?
Getting the game on there
The simple answer would be to go to the minecraft website, download the "vanilla" .jar and start it. This does work, but the official server is notoriously slow and inefficient, and god only knows how much we need efficiency right now. So let's try something better.
Spigot is a faster, plugin-compatible version of a minecraft server. It features many performance improvements over vanilla, and lets you tweak the settings to configure the game to be more performance oriented if needed. But we can do better.
Paper, based on Spigot, is an even faster minecraft server, based on what I can only assume is dar wizardry. On top of all the changes that Spigot makes to the vanilla server, it adds even more modifications to make your server run even better.

There are even faster and more bleeding-edge servers out there, but the sweet spot for performance and stability seems to be Paper. To install it, you just need to go to the right page and download the latest .jar.
Making it available
Everything is pretty much ready, and once the server boots up it can be reached by computers in the same network as the Tinkerboard. But that's not enough, is it? I wanted my friends from all over the internet to be able to connect to my server! One might think: ok, let's just share with them my public-facing ip, gathered with a simple service like ipchicken. But this does not work: between my local network (LAN) and the internet there's a sort of wall, the NAT, that takes care of sharing the single public facing IP address of my household between all the devices connected to my network. If a new request comes on port 25565 (the default for minecraft), how is the NAT supposed to know it should forward it to the Tinkerboard, instead of some other device?
The answer comes from a feature on my modem/router: port mapping. This simply tells the NAT inside the device to forward all public traffic belonging specific port (again, 25565) to an internal IP address and port combination, belonging in this case to my Tinkerboard and pointing to the port which Minecraft is listening on. This worked pretty well for me from the get go, and the first hours of fun were had simply connecting to 221.173.194.180 (fake ip, dont connect).
But there was a slight catch: many ISPs, including mine, have the habit of frequently shifting which IP address you're assigned to, making so that while today your players might be having fun on 221.173.194.180, tomorrow they might find some old lady's network attached to that, with no obvious minecraft server in sight. If I was wise enough to inform them, they might find that my home address has been changed to 79.92.77.71. But I don't like that: the system breaks if I'm not there to tell everyone the address, and what if the address changes while somebody is playing? There needed to be a better solution.

Enter the dynamic dns services: companies that, for free or for a small fee, allow you to set up a static public-facing url (with letters!) that points to your dynamically-changing IP address. Through a bit of searching I found that no-ip worked great for my configuration, and in no time I had a new shiny public facing url! This is great.
Closing off
So how does it run? Great, not perfect. It's perfectly fine for less than 5 players, at least if they're not doing anything crazy. Here are some misc things I did to improve performance and add quality-of-life features:
- turning down the render distance to about 10 to improve performance
- following this guide to tweak the various settings files, again to improve performance
- adding some of these tweaks to the launch script, to still try to squeeze a bit more juice out of the Tinkerboard. I don't fully trust guides like this, because the JVM is a complex beast and if I'm not 100% sure what I'm doing, I'm not convinced I'm improving the situation. Still, the explanations he gives are reasonable, so give it a try if you want
- installing an ftp server (vsftpd) that runs in parallel with minecraft, to allow for easier file transfer.
- installing eBackup, a plugin that routinely backs up your words and neatly puts it in a .zip in a folder. Neat.
- learning to use the
screencommand, to allow me to resume my server console from any terminal